
Brewing
How to Start Homebrewing with a One-Gallon Kit: A First-Batch Beginner Guide
September 22, 2026
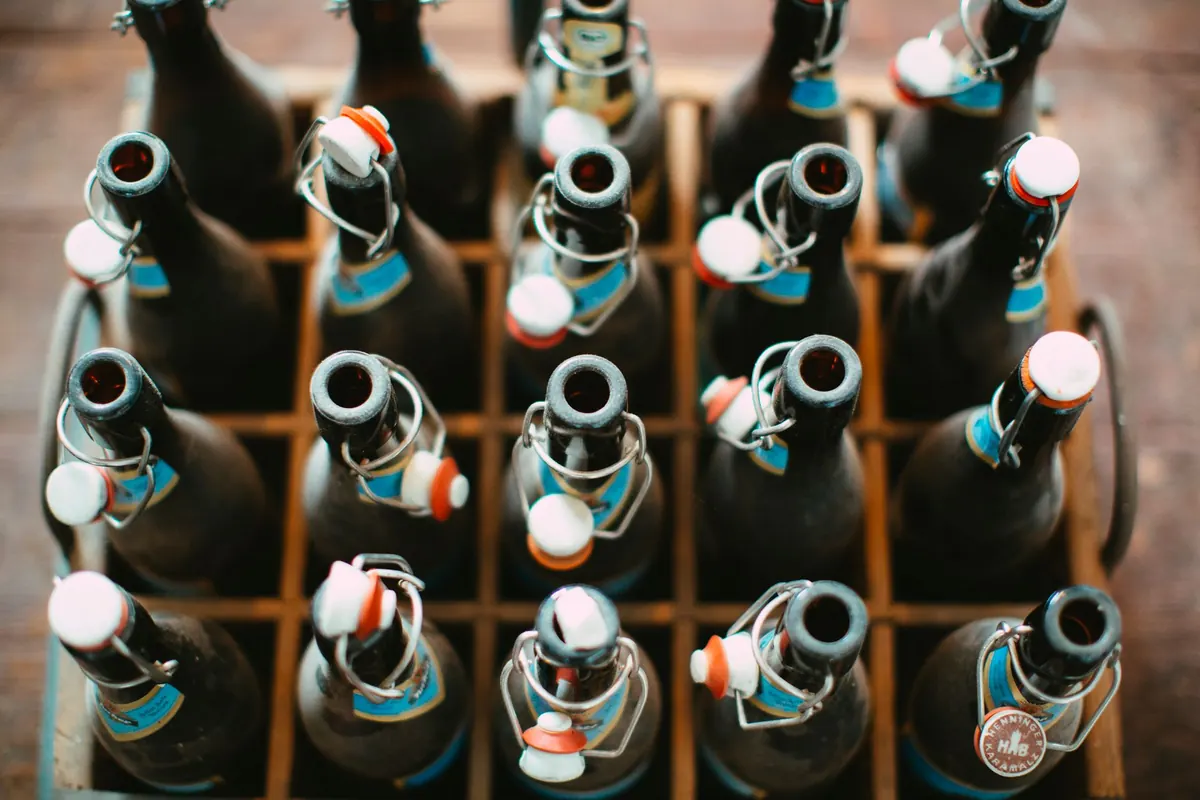
How to Start Homebrewing with a One-Gallon Kit: A First-Batch Beginner Guide
A gallon of beer is roughly ten bottles. That small number is the first thing to love about a one-gallon homebrewing kit. You are not committing to five gallons of a recipe you have never tried, you are not buying a garage full of equipment, and you are not spending an entire Saturday hovering over a kettle. You are making a manageable batch that fits on a kitchen stove, ferments in a corner, and bottles in under an hour. For a first batch, that is a gift. You can focus on learning the rhythm of brewing—clean, boil, cool, ferment, bottle, wait—without being overwhelmed by volume.
This guide walks you through what a one-gallon kit includes, what else you need, how to brew your first batch step by step, and the mistakes that trip up most beginners. By the end, you will know exactly what to do with those ten bottles.
Why a One-Gallon Kit Is the Best Way to Start
One-gallon brewing is often called small-batch brewing, and it has real advantages beyond saving space. It shortens the brew day, reduces the cost of ingredients, and makes it easy to try a recipe again if something goes wrong. If your first batch is not perfect, you have lost a few dollars and a few hours, not an entire keg’s worth of beer.
It Teaches the Process Without the Pressure
The basic steps of beer making are the same whether you brew one gallon or ten. You still mash or steep grains, boil wort, add hops, cool, pitch yeast, ferment, and package. A one-gallon kit lets you practice those steps at a scale where mistakes are cheap. You will learn what a rolling boil looks like, how fast an ice bath can cool a small pot, and how fermentation smells and sounds.
It Lets You Experiment
Because the batch is small, you can split it. Ferment half with one yeast and half with another. Dry hop one gallon and leave the other plain. Add fruit, coffee, or oak to a portion. A five-gallon brewer might hesitate to risk a whole batch on a strange idea. A one-gallon brewer can treat each batch like a test kitchen.
It Keeps Equipment Costs Low
Many one-gallon kits cost less than a night out. You can brew on a kitchen stove with a pot you already own. You do not need a propane burner, a large mash tun, or a fermentation chamber. You need a clean counter, a little patience, and a willingness to sanitize.
What Comes in a One-Gallon Kit
Kits vary by brand, but most beginner one-gallon kits include the following:
- One-gallon fermenter: Usually a glass jug or food-grade plastic carboy.
- Airlock and stopper: Lets carbon dioxide escape while keeping air out.
- Racking cane and tubing: For transferring beer without splashing.
- Bottle filler: A spring-loaded wand that makes filling bottles easier.
- Sanitizer: Often a no-rinse acid-based sanitizer.
- Recipe kit: Malt extract, hops, yeast, and sometimes priming sugar.
- Bottles and caps: Sometimes included, sometimes not.
Most kits do not include everything. You may still need a kettle, thermometer, bottle capper, and a small scale. Check the kit description before you buy so you are not caught without a critical piece on brew day.
Equipment You Still Need
- A 2- to 3-gallon kettle: One gallon of wort can foam up quickly, so extra headspace helps prevent boilovers.
- A long spoon or paddle: Stainless steel or food-grade plastic works well.
- A thermometer: You need to know when your steeping water is in the right range and when your wort is cool enough for yeast.
- Sanitizer: Star San or a similar no-rinse sanitizer is popular.
- Bottles and caps: You need about ten 12-ounce pry-off bottles.
- A bottle capper: A wing capper is inexpensive and works well for standard bottles.
- A small food scale: Useful for measuring hops, priming sugar, and specialty grains.
- A hydrometer: Optional, but it helps you confirm fermentation is finished and estimate alcohol by volume.
Sanitation: Your Most Important Ingredient
Clean first, sanitize second. Cleaning removes visible grime and residue. Sanitizing reduces the microbes that can spoil beer. Anything that touches wort after the boil must be clean and sanitized: the fermenter, airlock, stopper, siphon, tubing, bottle filler, bottles, caps, and your hands. Do not use a scented dish soap or a dirty sponge. Rinse thoroughly, then apply sanitizer according to the label.
If you remember only one rule from this guide, remember this: sanitize like your beer depends on it, because it does.
Your First Batch, Step by Step
- Read the recipe twice. Gather every ingredient and piece of equipment before you start. Set out your sanitizer and a clean bowl for small parts.
- Clean and sanitize. Clean the fermenter, airlock, stopper, siphon, tubing, and bottle filler. Let them sit in sanitizer for the recommended contact time.
- Heat your water. Put about one gallon of water in your kettle. If your tap water tastes good, it will probably make good beer. If it tastes strongly of chlorine, use bottled or filtered water.
- Steep specialty grains if your recipe includes them. Heat the water to about 155°F, add the crushed grains in a mesh bag, and steep for 20 minutes. Remove the bag and let it drain. Do not squeeze it hard, which can release harsh flavors.
- Bring to a boil and add malt extract. Turn off the heat, stir in the malt extract until fully dissolved, then return to a boil. Stir often to prevent scorching on the bottom.
- Follow the hop schedule. A typical one-gallon recipe might use hops at 60 minutes for bitterness, 15 minutes for flavor, and 5 minutes for aroma. Set a timer and do not walk away during the boil.
- Cool the wort quickly. Place the kettle in an ice bath in your sink. Stir gently. Cool the wort to about 70°F before transferring.
- Transfer to the fermenter. Pour or siphon the wort into the sanitized fermenter. Splash it deliberately to add oxygen, which yeast needs at this stage. Top off with cool, sanitized water to the one-gallon mark.
- Take a hydrometer reading. This is your original gravity. Write it down. If you do not have a hydrometer, skip this step and rely on time and visual signs.
- Pitch the yeast. Sprinkle the yeast on top of the wort or stir it in gently. Seal the fermenter with the stopper and airlock.
- Ferment in a dark, stable place. Most ale yeasts prefer 65°F to 70°F. Active fermentation usually starts within 12 to 72 hours. You may see foam, called krausen, and bubbles in the airlock.
- Wait. Leave the beer alone for at least two weeks. Resist the urge to open the fermenter. Every peek increases the risk of contamination and oxidation.
- Bottle. Sanitize your bottles, caps, siphon, tubing, and bottle filler. Boil about 0.7 ounces of corn sugar in one cup of water, cool it, and add it gently to the beer. Stir slowly without splashing. Fill each bottle, leaving about one inch of headspace, then cap.
- Condition. Store bottles at room temperature for two weeks. The yeast will eat the priming sugar and create carbonation.
- Chill and taste. Refrigerate one bottle for 24 hours, then open it. Pour carefully, leaving the sediment behind. Take notes. Your second batch will be better.
A Simple One-Gallon Recipe to Try First
If your kit came with a recipe, use it. If not, here is a forgiving American pale ale style that works well for beginners.
- Fermentables: 1 pound light dry malt extract
- Specialty grain: 0.25 pound crystal 20L, crushed
- Hops: 0.25 ounce Cascade at 60 minutes, 0.25 ounce Cascade at 5 minutes
- Yeast: Half a packet of US-05 or a similar ale yeast
- Priming: 0.7 ounce corn sugar, or one carbonation drop per bottle
- Target: About 1.045 original gravity, roughly 4.5% alcohol by volume, and about ten bottles
Note: Exact amounts vary by kit and desired strength. Always follow your kit’s instructions if they differ from this example.
Timeline for Your First Batch
- Day 0: Brew, cool, pitch yeast, and seal the fermenter.
- Day 1 to 3: Active fermentation begins. Look for krausen and airlock bubbles.
- Day 7 to 14: Fermentation slows. The beer begins to clear.
- Day 14: Bottle if gravity is stable and fermentation looks finished.
- Day 28: Chill one bottle and taste it. Carbonation should be present.
- Day 35 and beyond: Flavor often improves. Try another bottle each week to learn how it changes.
Common First-Batch Mistakes
- Bottling too early. If the yeast has not finished fermenting, adding priming sugar can create too much carbonation. Wait until gravity is stable over two or three days.
- Overpriming. Too much sugar can cause bottle bombs. Measure carefully. For one gallon, small differences matter.
- Fermenting too warm. High temperatures can create harsh, solvent-like flavors. Keep ale yeast in the mid-60s to low 70s Fahrenheit.
- Skipping sanitation. Wild yeast and bacteria can turn beer sour, medicinal, or cloudy. Clean and sanitize every piece that touches the beer after the boil.
- Boilovers. Malt extract wort foams aggressively. Use a larger kettle than you think you need and watch the first minutes of the boil.
- Oxidation. Splashing hot wort is fine, but splashing finished beer is not. Stir gently and siphon quietly when bottling.
- Impatience. Green beer often tastes flat, harsh, or buttery. Give it time to carbonate and condition.
Extra Useful Section: Bottling Without Bottle Bombs
Bottle bombs happen when too much carbonation builds up in sealed glass. The most common causes are bottling before fermentation is complete, using too much priming sugar, or mixing the sugar unevenly so some bottles get more than others. Use pry-off bottles rather than twist-offs when possible. Measure priming sugar by weight, not by guesswork. Dissolve it in water first, then mix it gently but thoroughly through the beer. Leave proper headspace, and store bottles in a cool, dark place inside a plastic tub or box while they carbonate. If a bottle gushes violently or the glass feels unusually pressurized, handle it carefully and chill it before opening.
Extra Useful Section: Tasting, Notes, and Improving
Keep a brewing notebook. Record the recipe, brew date, fermentation temperature, gravity readings, bottling date, and tasting notes. When you taste your first bottle, ask simple questions. Does it smell like fresh grain or fruit? Is the bitterness harsh or smooth? Is the body thin or full? Does it taste clean or yeasty? Common off-flavors include green apple, which often means the beer is young; butterscotch or buttered popcorn, which can come from incomplete fermentation; Band-Aid or medicinal notes, often from sanitizer issues or wild yeast; and wet cardboard, which usually points to oxidation. None of these mean you failed. They are clues. Adjust one variable next time, keep notes, and brew again.
Final Thoughts
A one-gallon kit is not a toy. It is a complete brewing classroom that fits on your kitchen counter. Those ten bottles can teach you more than a shelf full of expensive gear, because you can brew often, taste quickly, and change one thing at a time. Start simple. Sanitize carefully. Control your fermentation temperature as best you can. Wait longer than you want to. Then open a bottle, pour it into a glass, and taste what you made.
Relax, don’t worry, have a homebrew. Your first batch does not need to be perfect. It only needs to be yours.
Photo: Markus Spiske / Pexels
Related posts
More stories you’ll love reading